Raytracing Using Gather( )
| This project is created to become more familiar with the gather() function. With gather() we are able to increase the amount of samples (rays) that are being produced by the surface shader which it is incorporated into. This function allows for the reflection or refraction, among other things, to produce more believable effect by calculating a more continuous color which gives rise to antialiasing.
|
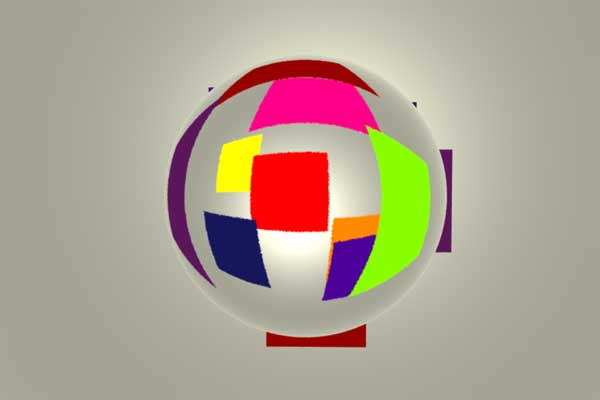
| I have decided to keep the scene as simple as possible, but still be able to convey what needs to get across. These scenes have been done in Houdini. I have decided to keep to refractions in this project since it has a better reaction that is more noticable. There is two main areas to this function that I have concentrated on. One is the samples, or number of rays, and the other is the samplecone, or the amount of spread of sampling. Sample is the amount or number of rays that are traced from the surface to other objects within the scene, the more samples you use the higher your information about the Ci or apparent color of objects of the scene you return to the gather() function. By using additive coloring and then dividing by the number of samples, you get a more average color for the individual areas sampled. Samplecone allow the user to increase the area that the samples are being randomly distributed centered around the true reflection angle. This samplecone allows for a more accurate sampling across an area. Samplecone has to be increased in small amounts since these degree increments are being recalculated into radians. So with all of this technical understanding, I created images showing increasing samples and the samplecone. In the images with increasing number of samples, samplecone is equal to zero. In the images with increasing samplecone the number of samples are equal to 1. I did this with the samplecone to show how the this starts to break down if you attempt to increase the samplecone without increasing the samples.
As you can see from the images as you increase the sample number, antialiasing starts to kick in. But at the same time as the samplecone increases with a static sample number there is more aliasing of the refracted image. This is because there is more area for the individual sample (ray) that has to be calculated. Also, as you increase the samples and the samplecone relative to each other you pay the expense of render times since there is more rays over a wider area that need to have the color information calculated. These colors are being calculated by each time the ray "hits" an object the shader is opened and the color information is extracted. click here for the gather() code Side note: After a lot of head scratching during this project I found that Houdini does not handle orientation the same way as Maya does. Essentially, Houdini does not use ReverseOrientation to reverse the polys on all the objects within the scene. Since this is the case, I have included in the shader an invert slider that essentially changes from a Houdini orientation to a Maya orientation so the shader can be used with either package.
|