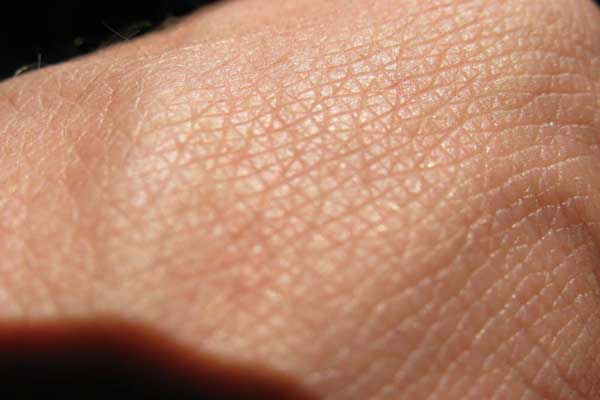
Skin Shader Introduction : I have always been interested in understanding how organisms in this world are able to protect itself from disease and infection. During my studies as an undergrad in biology, I was able to take classes in not oly human physiology but zoological physiology. In this I learned that skin, mostly of mammals, is the largest organ that we have. Skin, viewed normally, seems to be a very smooth surface. But as you get to the microscopic level, you see this vast terrain of great fissures running across the surface. It seems to look like the base of a giant drought washed lake, with cracks running in random direction. Below are a few images of human skin at a microscopic level.
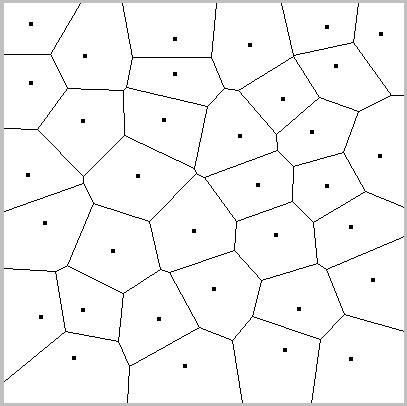
By focusing in on the the cracks on the surface of the skin I would want to create a procedural shader that takes into account as the camera gets closer to the object that the shader is applied to, the cracks increase in displacement. Essentially I would like to create a shader that changes based on the camera's ray length. Voronoi Cell Noise (A. K. A. Worley Noise) Background : I decide to start this project by delving into cellular pattern noise. I believe that this will lead me towards something that might resemble a microscopic skin texture. This cellular noise is known as Voronoi or Worley noise. Georgy Voronoi (1868 - 1908) : Came up with the matimatical theory that:
This theory allows for a bounding the region closer to a point than to any adjacent point. The polygons are drawn so that the lines are of equal distance between two adjacent points. Visually, this can create an interesting non-sequential patterning on a surface.
Steven Worley in 1996 presented a paper at SIGGRAPH that revelutionized the idea of cellular noise. With his new computations we are now able to expand the theory of G. Voronoi to include 3 dimensions. With this mathmatical computation we can create all different types of surface and displacement shaders. Creating A Basic Cell Noise displacement Shader : Starting this project entailed having a basic understanding of Worley noise and how it works. Once I was able to get that under my belt I created a library file that allows me to call to the Worley noise function within the shader which in turn allows for a less crowded code, which are both posted at the end of this webpage. A few of the basic parameters that need to be understood is : number of cells : Self explanatory, this creates more or less cells across the surface. line width : Self explanatory, this controls the width of the drawn lines. scalesize : The amount of smoothing between the bottom and the top edges of the lines. ( this only is in effect when dealing with displacement. This also lends torward uniform lines within the funtion. With these basic parameters I was able to create a simple displacement shader that I could control the number of cells, linewidth, and smoothstep. Below are images that show these parameters in action.
As you can see from above, by adjusting the number of cells within the shader creates a multitude of differing patterns on the surface of the object. More complex displacement shader : Working with the basic diplacement shader that I created above I then turned toward a more complex displacement that could somewhat simulate the look of microscopic skin. I decided to use a buildup of cellular noise to create the effect. Since the cells are being displaced up from the objects surface I can retrieve the amount of cellular displacement from the object from rest. Once having this I basic the next set or octave of cell noise on the amount a set amount of displacement from the first octave. Below is a sequence showing the displacement in multiple octaves.
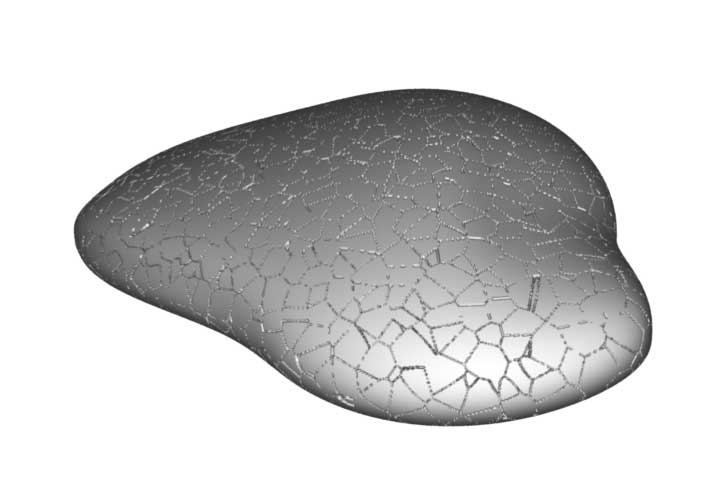
Now that I have a basic displacement shader that sort of resembles skin (at least reptile skin) I moved on to figuring out how to deal with displacement based off of the distance of the object from the camera. Displacement Based On Camera Distance : This was not an easy trick to pull off. I did start with the idea of just basing the displacement on time. Essentially, key framing the Km value over time to simulate the increase of the diplacement on the object. To get a more accurate idea of what it would look like on a character, I borrowed Howard Coulby's female model he designed in Maya. Once I had the character imported into Houdini as a .bgeo file I was able to apply the displacement shader and see the results of the initial test. Below is a sequence showing displacement over time as the camera is moving toward the character. This in no way is based on camera distance from the object.
So instead of trying to deal with the idea of writing into the shader a way of calculating the distance the camera is from the object, I relied on Houdini. By writing an expression based on the coordinate origin (vtorigin) of the object and the camera, I am able to get the distance from the camera. Thanks to Hubert Weldon for his help with understanding how vtorigin works. With this expression inserted into the Km value I am able to control the amount of displacement, if any, of the shader applied to the object. Below is a sequence that shows this in action.
Conclusions : For a basic skin shader based off of the camera distance from the object, I feel that I completed the task that I set out to accomplish at the beginning of this page. As for the problems that arose, which were minimal, I seemed to be able to find a fitting fix in the end. I would like to explore the voronoi noise more indepth so that I would be able to create a displacement that is based on a 3 sided polygon instead of 4 sided. I believe that this would give rise to a more "realistic" human skin shader. Other areas to delve into would be sub-surface scattering and color based on the bump height. click here for the displacement shader Side note : I did start to play around with some of the parameters in my displacement shader. I found that by increasing the width of the lines within the voronoi noise, I was able to get an effect of the displacement growing on the surface of the object. Below is a sequence showing this happening.
Resources : Books: Apodaca, A. and Gritz, L. Advanced Renderman: Creating CGI
for Motion Pictures. Ebert, D., Musgrave, F., Peachey, D., Perlin, K., and Worley, S. Texturing and Modelling: A Procedural Approach, 3 edition. San Francisco: Elsevier Science, 2003. Websites: Chris Gold "The Voronoi Web Site" April 2005. http://www.voronoi.com/
|
|||||||||||||||||